


I’m sharing this recipe with you because I love you. It is probably my most valuable possession, because the promise of quick, fresh bread keeps people coming back to my house to keep me company. There are a lot of quick, no-rise bread recipes out there, and I’ve certainly tried a few. But this is, hands down, the best of the best. It’s easy, versatile, and – most importantly – quick. You just need six ingredients, some water, and an oven, and you’re set.
I stumbled across this recipe last year, during a frantic Google search. Hanna of Crafty Kin published the recipe in October 2008, and you can find her original post here. I’ve made some modifications to the basic recipe, and I have a whole slew of suggestions for customizing your bread, but the original credit is totally owed to her!
First, let’s start with the basics. Fresh baked bread will make you exponentially cooler. It’s true. You’ll become the envy of your friends, the light of every dinner party, and basically the most attractive person on the planet. There’s just something about the smell of fresh bread. But if you’re busy and on a budget, it’s easy to think that the fresh bread lifestyle isn’t attainable. I’m here to tell you that all your dreams can, in fact, come true. You can bake bread, and here’s how you’re going to do it.
Literally The Best Bread Recipe Ever
- 2 ½ cups of warm water
- 5 tablespoons of sugar
- 3 tablespoons of active dry yeast
- 6 cups of flour
- 2 teaspoons of salt
- 1 teaspoon of baking powder
- First things first: preheat your oven to 425 degrees Fahrenheit.
Grab a big bowl, and stir the 2 ½ cups of warm water, 5 tablespoons of sugar, 3 tablespoons of yeast, and 2 tablespoons of oil together. Do something else for five to ten minutes, and then return to the mixture – it should be frothy on the top.
Next, add your 6 cups of flour, 2 teaspoons of salt, and 1 teaspoon of baking powder. Mix and knead the dough.
Now, you’re ready to bake your bread. But wait, there’s more! What kind of bread do you need? This dough is incredibly versatile, and it’ll really do just about anything you want. You can shape it into a loaf and bake on a cookie tin, or you can shape it into rolls. You can flatten it out for pizza dough. You can make some seriously awesome focaccia. Or you can cut exciting cookie molds out of it, like that of a Gingerbread Man using a skeleton-shaped gingerbread cookie cutter.
The possibilities are endless.
If you go the loaf route, you’ll need to divide your dough into several different loaves, to make sure that your bread isn’t too dense and cooks all the way through. If you’re shaping the dough yourself, judge this according to your own preferences. If you’re using a bread tin, divide the dough into thirds.
No matter what shape your bread has taken, bake at 425 degrees for ten to fifteen minutes. When the top of your bread is a nice golden brown, you’re all set!

It really is that easy, and there’s so much more you can do with this recipe. The original recipe called for 6 tablespoons of sugar, which I found a little much for my taste, so I cut that down. But at the original proportion, this would make a great base for cinnamon buns. I reduce the sugar even further (and up the salt a bit) when I want to add herbs to the recipe. My go-to adaptation is to add a tablespoon of dried, crushed rosemary, but experiment with different herbs to find your favorite. Last week, my friend brought over her own adaptation: she baked whole garlic cloves into a loaf. Delicious!
Even if this is your first stab at baking your own bread, chances are you have all of the ingredients – except, perhaps, the active dry yeast. That can be purchased in the baking needs section of your standard grocery store, but it’s a little pricey. I found that buying active dry yeast at bulk rates was the way to go, cutting my costs from $7 a jar to $2 for the same amount of yeast. Do your research, and you should be able to find a deal near you.
Welcome to the world of bread-baking. The possibilities are endless, and you’ll be everyone’s favorite houseguest.
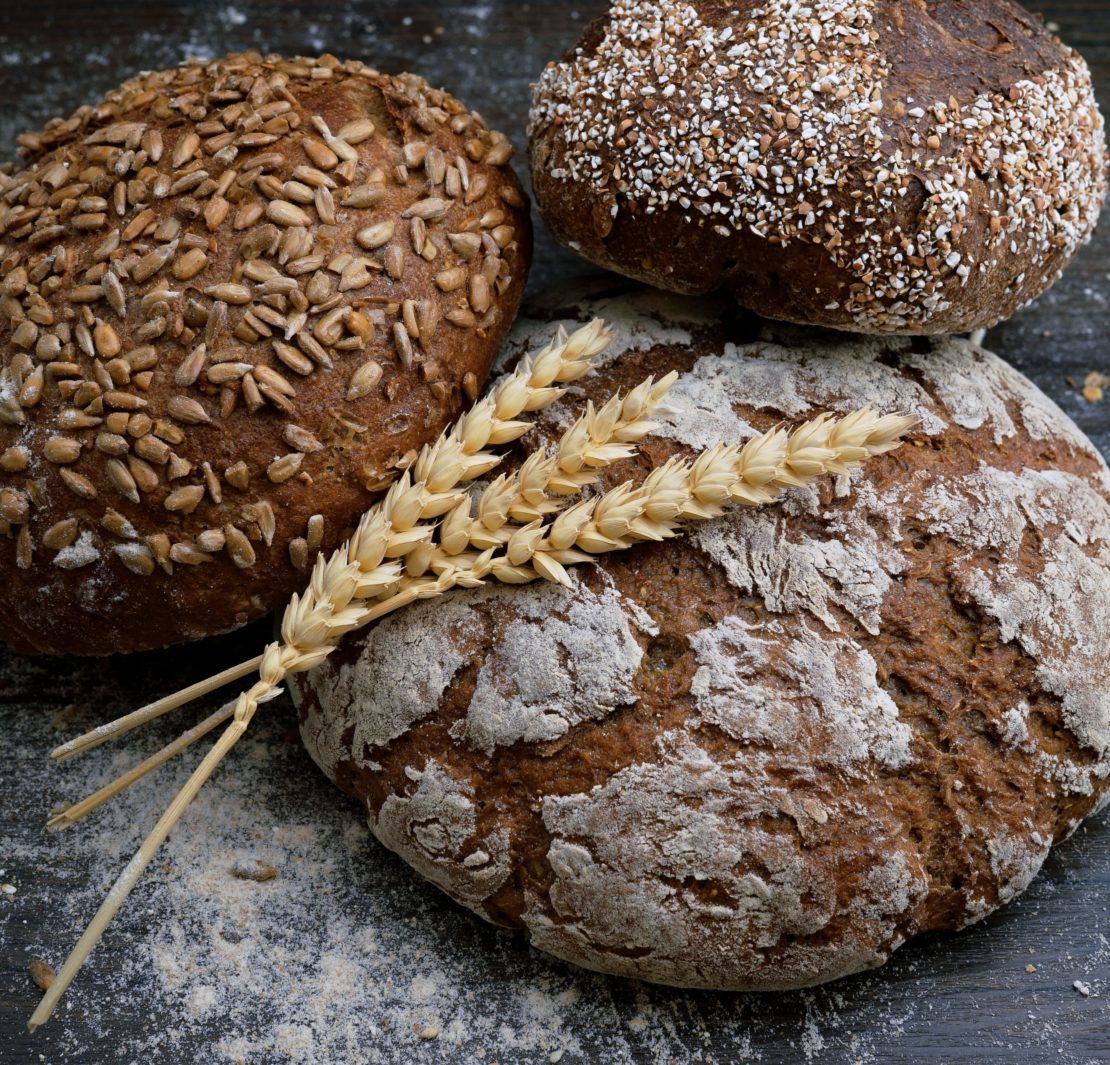
Photograph by Nico Nordström.

Literally the best bread ever. Of all time.
Just finished baking, and it’s a huge hit with the family!
We’re so glad to hear that, Greg! Happy baking!
My bread looks great. Surface beautiful but inside very wet after 25 mins of baking :-( Any help? Thanks.
wait, so does the dough not need to rise?
P.S. Thanks for the awesome recipe :)
Hi Kelsey! This is a no-rise bread recipe, so there’s no need to wait around for the dough to rise. Just make sure you let the water, sugar, oil, yeast mixture sit for about five minutes (or until frothy on top). Now, since I often use this recipe to make three or four small loaves of dough, I do notice that the dough will “grow” a bit while I’m waiting for the first loaf to come out of the oven – but that doesn’t really affect your final product too much.
What kind of flour? Bread flour or all purpose?
Hi Julia: I’ve used all purpose white flour and whole wheat flour!
Can I use bread flour tho?
You can use bread flour, but be prepared for it to be a bit denser than the loaf would be if cooked with all purpose white flour. You may want to separate the dough into smaller loaves that the recipes states if you use bread flour to try and combat the denseness, but regardless, it shouldn’t be much of a difference and can likely be substituted with little problem.
I tried this recipe twice…first not letting it raise and second….letting it raise. Personally, I felt letting the bread raise made for a much better bread texture. I also substituted one cup of soy flour to add more protein. Thanks for the recipe. I love food experimentation!
you may have redeemed me from years of failure as a baker! my husband is finally happy!
I’ve gotten into bread making over the last few months. One of my biggest gripes is waiting for the bread to rise. I gave this recipe a go and while the bread did rise in the oven and was moist, I found the actual taste of the bread to be too yeasty.
Kate, you were right. I have been making bread for ages, but it usually ended up dense and tough, due to my brain’s inability to purchase non whole wheat flour. Last night I baked my first-ever rolls which could not be used as projectile weapons, and when, as an experiment, I wrapped a pork roast in the dough(after cooking the roast), that turned out well too!
Thank you!
How long should the bread bake? I have everything just wondered about that. Thanks
How long do you knead it? Your picture looks like several loaves baked on a sheet or pizza stone. Did they rest or proof at all before baking?
Just tried the recipe. I needed 4.5 cups of water just to be able to get the six cups of flour to form. Baked it for 10-15 min and ended up with two nice super doughy bricks.
Most recipes I have ever used required you let the dough rise.
I’d call this the worst bread recipe ever!
My bread turned out beautifully crispy and golden on the outside and raw on the inside. Any ideas what I’m doing wrong?
I have the exact same problem!
Me too. I’m deciding to let it rise, break the dough into smaller pieces and bake for a bit longer on a lower temperature maybe 375 degrees Fahrenheit.
Normally I don’t feel compelled to comment on these things, but be warned: this bread is doughey as hell. This recipe is quick, but that’s about all I can say for it. Your dinner party will not be a hit if your bread is the consistency of play-dough.
Great bread. The only thing I did different was let the dough rise 1 hr.
I substituted 2cups of whole wheat flour for part of the recipe, and added not quite 4 cups of white flour. I added the flours slowly and stopped when I found the dough the right consistency to knead. I baked the bread for 20min until internal temp was 190f . I also created steam in the oven with a pan of hot water, about 2 cups in bottom of oven. The bread turned out great even when I forgot to add the salt. I seem to have brain fog lately.
We just tried making this bread and found by splitting the whole mixture into 3 smaller loaves then it cooked inside much better. Nice and crispy on the outside too. Thanks from New Zealand
What type of oil should we use? The oil is not in the ingredients list, but it is used in the instructions.
I absolutely LOVE everything about this recipe! And so does everyone else that has tried it! I make this once a week and all kinds of variations, it’s so versitile and yummy! Thank you for the recipe!
I think that this is an ‘okay’ recipe, and very versitile, but with a couple easy modifications you can make it really awesome. Personally, I would not serve the original recipe at a dinner party – good bread just takes time. Luckily most of that time is spent rising, so you can do other stuff.
Knead the last cup or two of flour into the bread, then let the bread rise in a big oiled bowl somewhere warm (like an oven thats been set to 200 and then turned off. Leave the door open a crack) until it doubles (aprox 45mins). Punch it down and knead it for a couple minutes on a lightly floured surface, then divide it into the portions you plan to make, and let it rise again in its pan/sheet/whatever until it doubles.
While you preheat your oven, boil some water and put it in an oven-safe bowl with your bread while it bakes.
I’d say these modifications added another 1.5 hours to the total time, but my buns and loaf all came out fluffy and moist and beautiful – not unpleasantly yeasty or doughy at all.
Best bread EVER!!!!!! Great for making buns, we made a cheese rendition! AND IT WAS AWESOME! our dinner party gobbled them up faster than a mouse and a piece of cheese! However we let it rise for at least 20 minutes and we neaded it a lot. I suggest that after you mix all the ingredients together you let it set.
This was literally NOT the best bread ever. It was a yeasty beast that came out too dense and doughy. I tried it as both a loaf and as pizza dough. Both versions tasted like I was eating beer, which in theory sounds delicious, but, in reality, is gross. I split the batch into three portions and cooked one immediately and let one rise a bit as another reader suggested. I just threw the last one away. Somewhere in this recipe the proportions are off.
This recipe is garbage. Only if this were the first bread a person had ever eaten would it be the best ever. And even then it’s doubtful. I’d be ashamed to serve this at a dinner party
Please don’t publish recipes if you don’t know how to. What kind of oil? Doesn’t say in the ingredients? You also say you use less sugar than in the recipe…then why not publish how you make it. Should have read the comments before i wasted so much yeast.
This is a typical pizza style dough recipe, a little drier,generally better if you work it a little more. If you find your bread tastes of stale yeast chances are you’ve either over-proved or not knocked the air out well enough after a first prove. You should always prove your dough twice at minimum, one time then knock back and knead, then give it one more, try to let it at least double in volume each prove, can take 30 mins to an hour good bread is often as much about patience as hard work! As a further measure to avoid a dense dough watch your oven heat, and probably baste the dough in water or milk – or oil if you must – and even think about putting a tray of water or a few ice cubes into the oven with the loaves, this will stop the crust forming too early and allow it to rise a lot more)…
I have tried countless recipes that have been posted on the web. Many of them have become our favorites. A couple have been less than favorable. I commend those who have taken the time to share their recipes and have often given the thumbs up but never could bring myself to disparage a recipe that failed miserably. THIS RECIPE has compelled me to do otherwise. All I can say is that there must be a missing step or two such as proofing. Surely the author has read the comments below – please help me to understand how this recipe stands out as the best bread recipe ever assuming taste and texture was one of your criteria. Thank you.
I compared her recipe to the person she states she got it from on the web…she even has a link to it…she left out the 2 tbsp of oil in her recipe above. I plan to try this bread tomorrow…I will let you know(:>)
I totally agree. I have been working as a chef for 10 plus years and have baked a ton of bread. This recipe was wonky at best! I made this recipe today to see what made it so good and I had to change a fair bit of it. I did half and half bread flour and 00 flour to lighten it up a bit, left out the baking powder, left out 1 tablespoon of yeast and only added 4 tablespoons of sugar. I let it rise (because it has to rise) and it smelled of the brewery next to my house. I hand kneaded two more cups of bread flour into the mix and let it rise again, well oiled, then shaped the dough into three round rustic loaves, two with Parmesan and one without. I let them proof for a third time for about 30 minutes and then I baked them at 425 degrees with an ice tray in the oven to slow the crust. This made bread. Not the best bread I have ever had in my life… But pretty good edible bread, lol!
I think that “bread bakers”, professional or for their families and friends should have known that they wouldn’t like this bread. If you made it anyway, just out of curiosity, as I did, stop complaining. Yes, it needs time to rise at least once, but many people have never made a yeast bread and this recipe was a good place to start. I wonder whether the baking powder or lack of rising was what made the texture more like a quick bread, but it doesn’t matter. Literally darling is so happy with this recipe that I think we should stop criticizing her and go make the kind of bread we always bake. This wasn’t intended for you anyway. You all sound so mean!
question, what is the purpose of yeast if you don’t give it time to rise?
I noticed right away that the instructions tell you to mix with 2 tablespoons of oil. Oil is not on the ingredients list. It makes me wonder what else is left out. Sorry, but I don’t think I will be trying this recipe.
I have followed recipe to the exact step by step but my rolls came out the same size I put on the baking sheet the taste is very poor and does not taste like a good yeast roll and is not like a yeast roll that you would pull apart and expect that fantastic taste or soft fluffiness these are like bread you would buy in a store almost like biscuits not happy at all
You say to add oil, but there is none in the ingredient list! Am I missing something?